Showing posts with label Web technologies. Show all posts

Sunday, 18 January 2015

Java Script alert Example


This is a simple tutorial on how to create a Java Script alert.
In Java Script there is a predefined function called alert() we now just invokes that function. Here we create a button and when button is clicked we call the alert() function with a custom text .

Lets see,

Java Script alert Example


Java Script alert Example


PROGRAM :

<!DOCTYPE html>
<html>
<body>
 
    <p>Click the button to display an alert box.</p>
 
    <button onclick="alert('This is a sample alert !');">Click me</button>
 
</body>
</html>


OUTPUT :

Click the button to show an alert box.

Fibonacci Series with JavaScript


This is a simple Java Script code which displays the fibonacci series upto the range given.

First we create a text field to enter some value and a button which on clicked calls the JavaScript function.

The HTML part is ,
Enter Some Value :<input type = "text" id= "val" ></input></br>
 <input type = "button" value ="Calculate"  onclick="fibonacci()">


then it looks like,
JavaScript  - Fibonacci Series

Now when  we enter the value and click the 'Calculate' button the script for calculating fibonacci will run,
<script type="text/javascript">
 function fibonacci(){
        var a = 0, b = 1, c = 0;
        var res = document.getElementById("val").value;
    
        while (b <= res) {

            document.write(c);
   document.write("</br>");
   
            c = a + b;
            a = b;
            b = c;
 
        }
 }
    </script>
JavaScript  - Fibonacci Series

The function fibonacci()  gets the input from the html by,
var res = document.getElementById("val").value;

now we will perform the actual logic for generating finonacci series
while (b <= res) {

            document.write(c);
   document.write("</br>");
   
            c = a + b;
            a = b;
            b = c;
 
        }


JavaScript  - Fibonacci Series

The complete HTML file  code is as below,
<html>
   <body>
      Enter Some Value :<input type = "text" id= "val" ></input></br>
      <input type = "button" value ="Calculate"  onclick="fibonacci()">
<script type="text/javascript">
         function fibonacci(){
                var a = 0, b = 1, c = 0;
                var res = document.getElementById("val").value;
            
                while (b <= res) {
         
                    document.write(c);
                    document.write("</br>");
           
                    c = a + b;
                    a = b;
                    b = c;
         
                }
         }
           
</script>
   </body>
</html>


OUTPUT : 
Enter Some Value :


Thursday, 1 January 2015

HTML , PHP - Login Page.


In this post i will show you how to create a basic login page and check those values in the database and also do some error checking like empty values are not allowed.

Here i will use xampp as a server and it has a database with 4 columns username , password, gender and name. (refer to my previous post on creating a registration form)


Now open a file in any text editor and place the following code :

<!DOCTYPE HTML> 
<html>
   <head></head>
   <body>
      <?php
         $servername = "127.0.0.1";
         $username = "codingcorner";
         $password = "yourPassword";
         $dbname="sample";
         
         
          $StatusValid = $StatusInValid =$unameErr  = $pwdErr = " ";
          $uname  = $pwd = "";
         
         if ($_SERVER["REQUEST_METHOD"] == "POST") {
           
         
           if (empty($_POST["uname"])) {
             $unameErr = "Username is required";
           } else {
             $uname = test_input($_POST["uname"]);
           }
         
           if (empty($_POST["pwd"])) {
             $pwdErr= "Password is required";
           } else {
             $pwd = test_input($_POST["pwd"]);
           }
         
           
         }
         ?>
      <h2>A Simple Login Form</h2>
      <form method="post" action="<?php echo htmlspecialchars($_SERVER["PHP_SELF"]);?>"> 
         Username: <input type="text" name="uname">
         <span class="error">* <?php echo $unameErr;?></span>
         <br><br>
         Password: <input type="password" name="pwd">
         <span class="error">*<?php echo $pwdErr;?></span>
         <br><br>
         <input type="submit" name="submit" value="Login"> 
      </form>
      <br><br>
      <?php
         $conn = mysqli_connect($servername, $username, $password,$dbname);
         
         if (!$conn) {
         die("Connection failed: " . mysqli_connect_error());
         }
         $sql= ("SELECT username, password FROM users WHERE username='$uname' && password='$pwd'");
         $result = mysqli_query($conn, $sql);
         if ($result && mysqli_num_rows($result) >0)
         {
             $StatusValid = "Successfully Logged in"; 
         }
         else
         {
         $StatusInValid = 'Username and Password NOT Found , TRY AGAIN !!';
         }
         mysqli_close($conn);
         
         function test_input($data) {
         $data = trim($data);
         $data = stripslashes($data);
         $data = htmlspecialchars($data);
         return $data;
         }
         
         echo "STATUS :";
         if ($_SERVER["REQUEST_METHOD"] == "POST") {
         echo $StatusValid; 
         echo $StatusInValid; 
         }
         ?>
   </body>
</html>
OUTPUT :

Initially


When Incorrect details are entered


When valid details are entered


The Entries in database are  (refer previous post - developing registration form )


That's it ! We are done with our login page.


Reference : W3schools

Wednesday, 31 December 2014

HTML , PHP - Registration Form


In this post i will show you how to create a basic registration page and store those values in the database and also do some error checking like empty values are not allowed.

Here i will use xampp as a server and create a database there with 4 columns username , password, gender and name. These are the values we will store in our database name sample and table name users.


Now open a file in any text editor and place the following code :


<!DOCTYPE HTML> 
<html>
<head>
</head>
<body> 

<?php

$servername = "127.0.0.1";
$username = "codingcorner";
$password = "yourPassword";


$nameErr = $unameErr = $genderErr = $pwdErr = "";
$name = $uname = $gender = $comment = $pwd = "";

if ($_SERVER["REQUEST_METHOD"] == "POST") {
  if (empty($_POST["name"])) {
    $nameErr = "Name is required";
  } else {
    $name = test_input($_POST["name"]);
  }

  if (empty($_POST["uname"])) {
    $unameErr = "Username is required";
  } else {
    $uname = test_input($_POST["uname"]);
  }

  if (empty($_POST["pwd"])) {
    $pwdErr= "Password is required";
  } else {
    $pwd = test_input($_POST["pwd"]);
  }

  if (empty($_POST["comment"])) {
    $comment = "";
  } else {
    $comment = test_input($_POST["comment"]);
  }

  if (empty($_POST["gender"])) {
    $genderErr = "Gender is required";
  } else {
    $gender = test_input($_POST["gender"]);
  }
}


try {
    $conn = new PDO("mysql:host=$servername;dbname=sample", $username, $password);
    // set the PDO error mode to exception
    $conn->setAttribute(PDO::ATTR_ERRMODE, PDO::ERRMODE_EXCEPTION);
     $sql = "INSERT INTO users (username, password , gender , name)
    VALUES ('$uname', '$pwd','$gender','$name')";
    // use exec() because no results are returned
    $conn->exec($sql);
    echo "Welcome !";
    }
catch(PDOException $e)
    {
    echo "Connection failed: " . $e->getMessage();
    }

function test_input($data) {
  $data = trim($data);
  $data = stripslashes($data);
  $data = htmlspecialchars($data);
  return $data;
}


?>

<h2>A Simple Registration Form</h2>
<form method="post" action="<?php echo htmlspecialchars($_SERVER["PHP_SELF"]);?>"> 
   Name: <input type="text" name="name">
   <span class="error">* <?php echo $nameErr;?></span>
   <br><br>
   Username: <input type="text" name="uname">
   <span class="error">* <?php echo $unameErr;?></span>
   <br><br>
   Password: <input type="password" name="pwd">
   <span class="error">*<?php echo $pwdErr;?></span>
   <br><br>
   Comment: <textarea name="comment" rows="5" cols="40"></textarea>
   <br><br>
   Gender:
   <input type="radio" name="gender" value="female">Female
   <input type="radio" name="gender" value="male">Male
   <span class="error">* <?php echo $genderErr;?></span>
   <br><br>
   <input type="submit" name="submit" value="Submit"> 
</form>

<?php
echo "<h2>Your Details:</h2>";
echo $name;
echo "<br>";
echo $uname;
echo "<br>";
echo $pwd;
echo "<br>";
echo $comment;
echo "<br>";
echo $gender;
?>

</body>
</html>
Now save this file as registration-tuts.php or any other name you wish in C:\xampp\htdocs or any path where your xampp is installed .
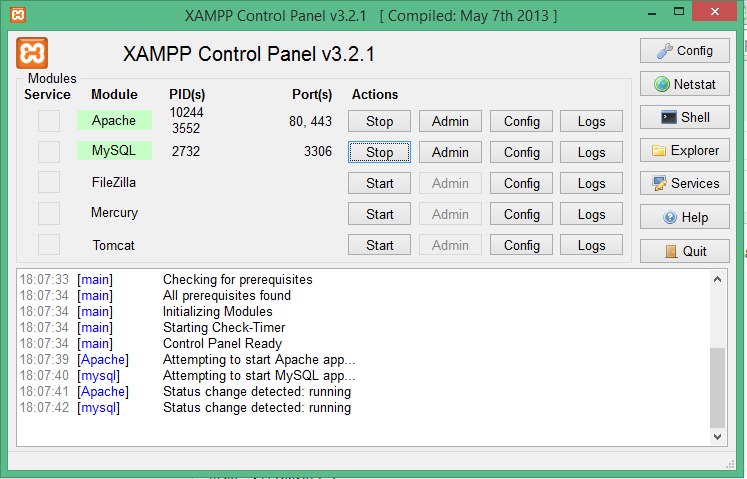
 Start Apache and Mysql in your xampp control panel.

 It looks something like this

Now open any browser and give the url as http://localhost/registration-tuts.php 
now the page we just created will open


OUTPUT : 

When the * mark (required fields ) are not filled it shows an error telling this field is required .


When all the fields  are filled .


Now we will check the database we created in the beginning for the details entered here.

In the browser go to localhost/phpmyadmin and then in the right side select your database and table , then it will show you the details you entered in the form we created.


That's it ! We are done with our registration form.


Referencew3schools


Sunday, 28 December 2014

HTML , CSS - Basic template for your website


In this post i will show you how to create a basic HTML page . Here i called it as a template because a template is one that remains same throughout the website , only the content in your pages varies.

Templates are necessary to create because we need not code all the markups again for each page , if we have a template decided then  we can just keep working on that template every time when we add  pages to our site.

Mainly a template consists of  a  header , nav ,aside ,section, article, footer.


A Basic template for a website


Header generally contains the name of our website .
Navigation generally contains the main navigation to our site
Aside generally contains sub navigation and even we can place ads mostly right side aside tag is prefered for ads and left side one for sub navigation
Section  generally contains the main content of  a site.
Articles generally seperates 2 different posts/topics.
Footer generally contains the copyrights , license and any other such information


Lets now create this basic template ,

1) Open a create a new html page , by opening a new notepad file or if u have any advanced tools like       notepad++ , sublime go ahead open with them and save it as .html extension.

Now add the following code in that file

<! doctype html>
<html lang="en">
   <head>
      <meta charset="utf-8"/>
      <link rel="stylesheet" href="codingcorner-tuts.css">
      <title>Give a title to your page!</title>
   </head>
   <body>
      <div id="wrapper">
         <header>
            Name of Your Website
         </header>
         <nav id="menu">
            <ul>
               <a href="#">
                  <li>Home</li>
               </a>
               <a href="#">
                  <li>Menu Item 1</li>
               </a>
               <a href="#">
                  <li>Menu Item 2</li>
               </a>
               <a href="#">
                  <li>Menu Item 3</li>
               </a>
               <a href="#">
                  <li>Menu Item 4</li>
               </a>
               <a href="#">
                  <li>About</li>
               </a>
               <a href="#">
                  <li>Contact</li>
               </a>
            </ul>
         </nav>
         <br><br><br>
         <img src="banner.jpg"   width="100%" height="200em"/></a>
         <div id="middlecontent">
            <aside>
               Ads or some other side navigation
            </aside>
            <section>
               <article>
                  <p> This is the main section of your page , here all the content in your site is placed.
                  <h3> C  program on Simple Intrest </h3>
                  <pre>
#include &lt;stdio.h&gt;
    #include &lt;stdlib.h&gt;
    int main()
    {
     float SI,p,t,r;
     printf("Enter Principle Amount: \t");
     scanf("%f",&p);
     printf("Enter Time Period: \t\t");
     scanf("%f",&t);
     printf("Enter Rate Of Interest: \t");
     scanf("%f",&r);

     SI = (p*t*r)/100;

     printf("Simple Interest is \t\t%f",SI);

     return 0;
    }
</pre>
               </article>
               <article>
                  <p> You can write another article here.
               </article>
            </section>
            <aside>
               Ads or some other navigation
            </aside>
         </div>
         <footer>
            This is a footer
         </footer>
      </div>
   </body>
</html>

Now add  a css file to it , create a new file and save it as .css extension add the following code in that file


body{
    font-size:100%;
    background-color:#000;
}
#wrapper{
    width:100%;
}
header{
    font-size:2em;
    color:#FFF;
}
nav{
    text-align:center;
}
#menu li{
    width:14%;
    margin:0.1%;
    background-color:#FFF;
    float:left;
    font-size:1.2em;
    color:#00F;
}
#menu li:hover{
    background-color:#E8EBEA;
}
section{
    width:58%;
    background-color: #FFF;
    margin:2%;
    padding:0.2em;
}
article{
    padding:0.4em;
    
}
aside ul a{
    text-decoration:none;
    color:#00F;
}
aside ul li{
    list-style:none;
}
aside ul li:hover{
    color:#777;
}
aside{
    width:16%;
    padding:0.2em;
    margin:1%;
    background-color:#EEE;
    display:-webkit-box;
}
#middlecontent{
    display:-webkit-box;
    background-color:#222;
}
footer{
    background-color:#FFF;
    color:#f00;float:none;
    text-align:center;
}
Now OUTPUT will be something like :


HTML -  A Basic Template